
Tote bag with a lining, handles, and a pocket
Do you need a last-minute trick-or-treat bag, or project bag? Or maybe you're looking for something unique and fun to do with your finished Embroidery of the Month projects. Well, today we're going to learn how to turn your embroidery project into a simple diy tote bag!
This tutorial will show you how to add a lining, make handles, and even put a pocket on your bag. Feel free to be creative and make your bag your own! I made mine into a trick-or-treat bag, with stripes and a pocket on the front. Follow along below!
Make a bag with me in real time
If you're interested in watching the live process, you can check out these videos where I put together my tote bag, from beginning to end, in real time (no fast-forward-y clips here!). Keep scrolling to find the step-by-step tutorial.
Gathering supplies, cutting fabric, and making the pocket:
Putting the bag together, making the handles, and sewing on the handles:
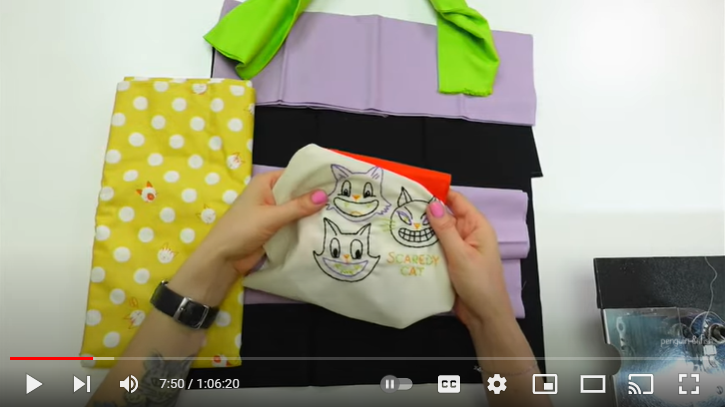
Finishing up the tote bag, sewing on the handles:
Step-by-step tote bag instructions:
Gather your supplies
First, we'll gather our supplies. Sewing doesn't have to be complicated. Feel free to use whatever you have on hand, and whatever methods work best for you. Here's what you'll need to make the tote bag:
- Outer fabric, enough for both the front and the back panels
- Lining fabric, enough to match the front and the back size
- Pocket fabric, enough for the size of the pocket plus a lining
- Fabric for the tote bag straps, about 1 fat quarter
Cut the fabric

Feel free to cut your fabric to whatever size you want, the sewing process will stay the same. Don't forget to add a seam-allowance. For example, if you want your bag to be 8"x10" finished, cut your panels at 8.5" x 10.5".
Note: If you want to use your embroidery pattern as the front panel of the bag but it's not big enough, simply sew fabric to the sides of the embroidery piece and then cut to your desired size.
Here are the cutting measurements for the bag I made in the video:
- Front and back panels: 14 1/2" x 16 1/2"
- Lining panels (2 pieces): 14 1/2" x 16 1/2"
- Pocket front and lining: 6 1/2" x 6 1/2"
- Handles (2 pieces): 4" x 21.5"
Prepare the pocket (optional)
If you're putting a pocket into your tote bag, it's good to have that ready first. Here's how I made my pocket.
Step 1: Cut the front of the pocket and the pocket lining so they are the same size.
Step 2: Placing right sides together, sew all the way around, leaving 2-3 inches at the BOTTOM of the pocket to turn.

Step 3: Before turning the pocket, snip the 4 corners off, being careful not to cut the threads
Step 4: Turn the pocket right sides out and push the corners out with a chopstick (or whatever you have around). Press the edges flat.
Step 5: Now, top stitch across the TOP of the pocket, about 1/16 of an inch from the top. We'll stitch the sides and the bottom when we put it onto our panel.

Step 6: Align your pocket in its desired placing on the bag. If you want your pocket on the inside of your bag, sew it to the lining instead of the front. Pin in place.

Step 7: Sew the sides and bottom of the pocket, back tacking at the beginning and the end

Assemble the tote bag
(Optional stripes option)
If you want to make your tote bag striped, like my sample, you'll want to do this first. Here's how: Cut your strips, 4 of each color, to 14.5" x 4.5". Sew together two of each, every other color, so that you end up with 2 identical panels that are 14.5" x 16.5".

Step 1: Be concsious of directional fabric at this step. Pairing the front panel and the front lining, place right sides together and sew across the TOP, about 1/16 of an inch from the edge. Do the same for the back panel and the back lining panel,
NOTE: If you have a pocket, you'll want to be aware of the direction it is facing.

Step 2: Open these pieces and press the seams open.
Step 3: Laying the pieces right sides together, line up the seams so that the outer pieces touch and the lining pieces touch. Clip all the way around, paying close attention to line up the seams if you made stripes.

Step 4: Sew all the way around, leaving a 3-4 inch opening at the BOTTOM of the lining piece
Step 5: Turn right side out and poke out the corners for the outside of the bag. Don't worry about poking out the corners for the lining.

Step 6: Finger press the opening at the bottom of the lining and sew shut.

Step 7: Stuff the lining into the bag and press the seam around the top. Sew around the top, about 1/16 of an inch from the edge.

Make & place the handles
There are a number of ways to make handles for a tote bag, this is just one. I personally like the look of the handles sewn to the outside of the bag. Here's how I did it:
Step 1: Cut the fabric. Feel free to cut to whatever length and width you want. For the width, decide on what you want your finished width to be, then multiply that number by 4 to get the width of your cut. My finished handles are 1", so I cut them 4" wide.
Step 2: Fold your strip in half and iron along the fold. If you have patterned fabric, be sure to keep your pattern on the outside of this fold.

Step 3: Now, open the strip and fold the two edges in to touch in the middle. Iron flat, then fold in half again and iron one more time.


Step 4: For a more finished look along the short edges, unfold the ends just a bit and fold the short edge in about 1/4" and press. Then fold back together the long way and press again, if needed. Do this for both short edges

Step 5: Sew along both sides of the long edges, starting with the open edge, about 1/16 of an inch from the edge.

Step 6: Repeat steps 2-5 for the second handle.
Step 7: Working with one handle at a time, pin the handle onto the bag. I put mine 1 1/2 inches from the top and 3 inches from the side. Pin in place.

Step 8: Sewing 1/4 inch from the edges, sew a square then an X to secure the handles to the bag. Do this on both sides of the handle, then repeat for the second handle.

Voila! A simple tote page to highlight your embroidery pattern.

Practice your stitching and make something cute!

Get a surprise Penguin & Fish embroidery delivered to your door every month! On the first day of each month we reveal a new embroidery design that's available for that month.
Get 30% off your first month when you Subscribe!
Use code 'FIRSTBUNDLE' at checkout.

1 comment
Sherry Smith
Thank you so much for the directions how to make this tote bag. It is so Cute!! I hope to make a couple of these for gifts. Maybe the Oct. embroidery can be a pocket!? Can’t wait to see it. Enjoy your nightly stitch along so much. Sherry